, Check Verification Solution Hub Groupes Pages Marketplace Evènements Blogs Financement Offres Emplois Courses Film Jeux Merits
How to Set up Node.js in Visual Studio Code

Setting up Node.js in Visual Studio Code is straightforward. Here’s a step-by-step guide:
Step 1: Install Node.js
- Download Node.js from the official site: https://nodejs.org/
- Install it by following the setup wizard.
- Verify installation:
- Open Command Prompt (Windows) or Terminal (Mac/Linux).
- Run:
node -vnpm -v - If both return version numbers, Node.js and npm (Node Package Manager) are installed.
Step 2: Install Visual Studio Code
- Download and install VS Code from: https://code.visualstudio.com/
- Open VS Code.
Step 3: Install the Node.js Extension
- Open VS Code.
- Go to Extensions (Ctrl + Shift + X).
- Search for "Node.js Extension Pack".
- Click Install.
Step 4: Setup a Node.js Project
- Open a terminal in VS Code (Ctrl + `).
- Create a new project folder:
mkdir my-node-app cd my-node-app - Initialize a Node.js project:
This creates anpm init -ypackage.jsonfile.
Step 5: Create a Simple Node.js File
- Inside VS Code, create a new file:
index.js. - Add the following code:
console.log("Hello, Node.js!"); - Run the file using the terminal:
You should see:node index.jsHello, Node.js!
Step 6: Debugging in VS Code (Optional)
- Go to Run & Debug (
Ctrl + Shift + D). - Click "Create a launch.json file".
- Choose "Node.js".
- Set breakpoints and debug your code.
Catégories
- Make Money
- Product Review
- Social Media
- Excel
- Graphics design
- Freelancing/Consulting
- E-commerce and Digital Marketing
- Business
- Self Development
- Tips to Success
- Video Editing
- Photo Editing
- Website Promotion
- YouTube
- Computer
- Téléphone
- Music
- Spirituality & Faith
- École
- Tech & Digital
- Gaming
- News
- Digital Economy / Technology
- Relation
- Creative Arts & Design
- Medical
- Causes
- Networking
Lire la suite
In our digital-driven, hyper-productive world, spirituality often feels like a forgotten whisper. But for modern thinkers—those who question, analyze, and innovate—daily spiritual rituals are not outdated practices; they are powerful tools for inner clarity, emotional balance, and mental resilience. Whether you're a tech entrepreneur, a student, a creative, or a busy professional,...

In the world of modern web and app development, managing dependencies efficiently is crucial. That’s where Yarn comes in. Yarn is a fast, reliable, and secure package manager for JavaScript projects, developed by Facebook (now Meta) in collaboration with Google, Tilde, and Exponent in 2016. It was created as an alternative to npm (Node Package Manager), addressing issues with speed,...

Creating a responsive navigation bar (navbar) using HTML, CSS, and JavaScript ensures that your website's menu adjusts seamlessly across different screen sizes, from desktops to mobile devices. Below is a step-by-step guide to building a responsive navbar, including key points, explanations, and full source code. Key Points of a Responsive Navbar Structure with HTML: Use the <nav>...
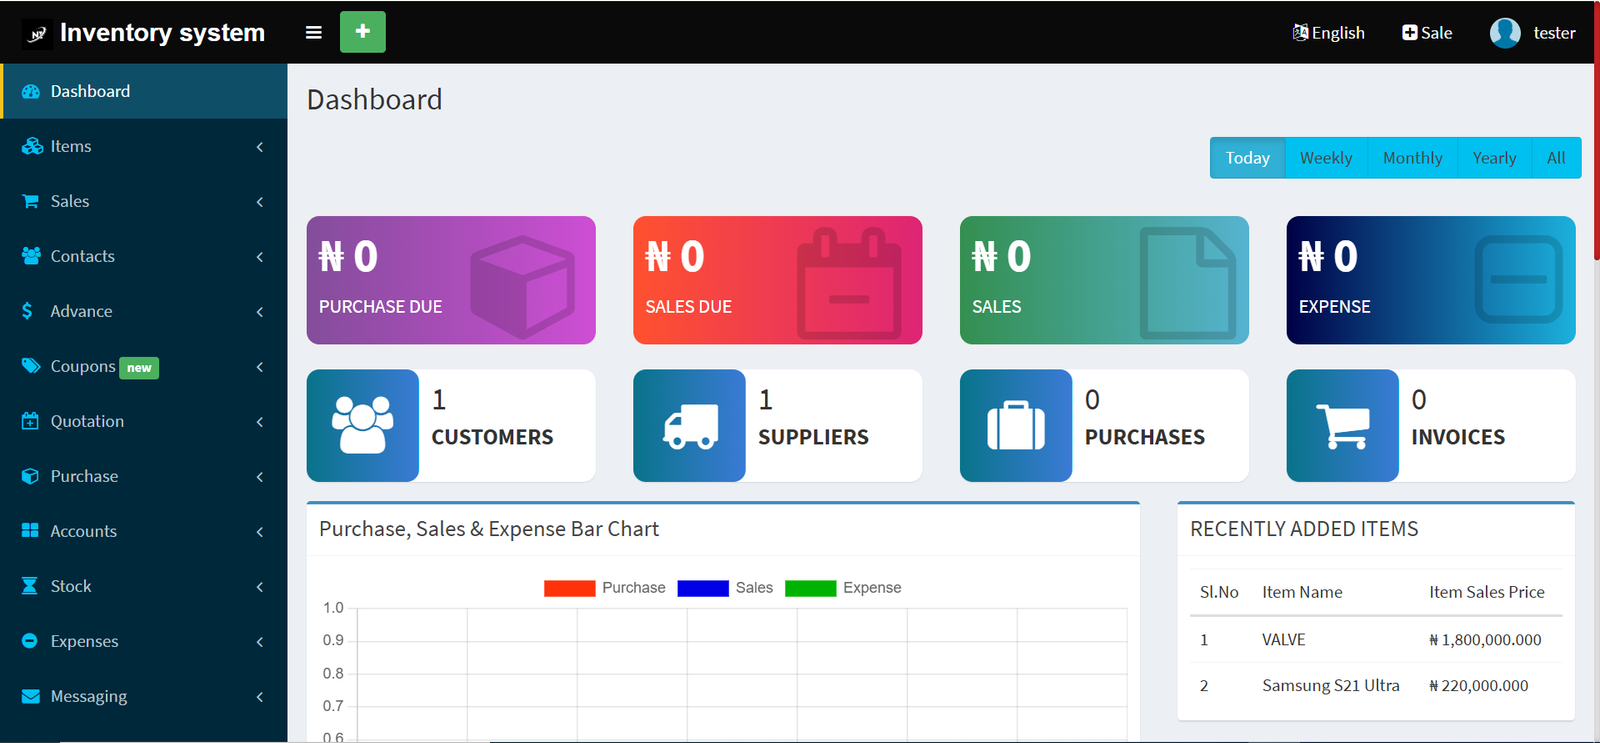
This demo gives you a quick look at our inventory management platform. You can explore how products, categories, stock levels, and transactions are managed through a clean and easy-to-use interface. Please note — this is a general demo version. We offer full customization based on your business size, preferred modules, and specific requirements. Custom features and integrations are...
say no were smart because why should we invent something completely new He got his eyes on whether other fashion weeks might adopt similar criteria next particularly where like in there is a strong line up of smaller independent brands. Sure those labels have a presence but there are also young designers mixing fashion with art and performance evening wear for princesses even collections of...