


, Check Verification Solution Hub Groups Pages Market Events Blogs Funding Offers Jobs Courses Movies Games Merits
How to Build a Clean Online Portfolio Using PHP

Building a clean online portfolio requires careful planning, attention to design, and well-structured code. Below is a narrative guide along with source code and key steps to help you create a professional and minimalistic portfolio using PHP, HTML, CSS, and JavaScript.
Step 1: Plan Your Portfolio
Before writing any code, decide on:
- The purpose of your portfolio (e.g., showcasing design work, development projects, photography)
- Key sections (e.g., Home, About, Portfolio/Projects, Contact)
- Design inspiration (minimalist, modern, creative)
- Responsive design for mobile and desktop views
Step 2: Set Up the Project Structure
Create a project folder and organize it as follows:
portfolio/
│── index.php
│── about.php
│── projects.php
│── contact.php
│── assets/
│   ├── css/style.css
│   ├── js/script.js
│   ├── images/
│── includes/
│   ├── header.php
│   ├── footer.php
Step 3: Create the HTML Structure (index.php)
Use PHP includes for better maintainability of headers and footers.
index.php
<?php include 'includes/header.php'; ?>
    <section class="hero">
        <div class="container">
            <h1>Welcome to My Portfolio</h1>
            <p>I'm a Web Developer passionate about clean and modern design.</p>
            <a href="projects.php" class="btn">View My Work</a>
        </div>
    </section>
<?php include 'includes/footer.php'; ?>
Step 4: Create a Reusable Header and Footer
Instead of repeating HTML code on every page, use PHP includes.
includes/header.php
<!DOCTYPE html>
<html lang="en">
<head>
    <meta charset="UTF-8">
    <meta name="viewport" content="width=device-width, initial-scale=1.0">
    <title>My Portfolio</title>
    <link rel="stylesheet" href="assets/css/style.css">
</head>
<body>
    <header>
        <nav>
            <ul>
                <li><a href="index.php">Home</a></li>
                <li><a href="about.php">About</a></li>
                <li><a href="projects.php">Projects</a></li>
                <li><a href="contact.php">Contact</a></li>
            </ul>
        </nav>
    </header>
includes/footer.php
<footer>
<p>© <?php echo date("Y"); ?> My Portfolio. All rights reserved.</p>
</footer>
<script src="assets/js/script.js"></script>
</body>
</html>
Step 5: Add CSS for a Clean Look
A modern and simple style will improve your portfolio’s appearance.
assets/css/style.css
* {
    margin: 0;
    padding: 0;
    box-sizing: border-box;
    font-family: Arial, sans-serif;
}

body {
    background: #f8f9fa;
    color: #333;
}

header {
    background: #333;
    padding: 15px 0;
    text-align: center;
}

nav ul {
    list-style: none;
    display: flex;
    justify-content: center;
}

nav ul li {
    margin: 0 15px;
}

nav ul li a {
    color: white;
    text-decoration: none;
}

.hero {
    text-align: center;
    padding: 100px 20px;
}

.container {
    max-width: 800px;
    margin: auto;
}

.btn {
    display: inline-block;
    padding: 10px 20px;
    background: #007bff;
    color: white;
    text-decoration: none;
    margin-top: 20px;
    border-radius: 5px;
}

footer {
    text-align: center;
    padding: 20px;
    background: #333;
    color: white;
    margin-top: 50px;
}
Step 6: Add JavaScript for Interactivity
Enhance the user experience with JavaScript.
assets/js/script.js
document.addEventListener("DOMContentLoaded", function() {
    console.log("Portfolio loaded successfully!");
});
Step 7: Add an About Page (about.php)
<?php include 'includes/header.php'; ?>
    <section class="container">
        <h2>About Me</h2>
        <p>Hello! I'm a web developer with a passion for creating beautiful and functional websites.</p>
    </section>
<?php include 'includes/footer.php'; ?>
Step 8: Display Projects (projects.php)
You can fetch project details from a database or keep them as static cards.
<?php include 'includes/header.php'; ?>
    <section class="container">
        <h2>My Projects</h2>
        <div class="project">
            <h3>Project 1</h3>
            <p>A description of the project.</p>
        </div>
        <div class="project">
            <h3>Project 2</h3>
            <p>A description of another project.</p>
        </div>
    </section>
<?php include 'includes/footer.php'; ?>
Step 9: Create a Contact Form (contact.php)
<?php include 'includes/header.php'; ?>
    <section class="container">
        <h2>Contact Me</h2>
        <form action="send_message.php" method="POST">
            <input type="text" name="name" placeholder="Your Name" required>
            <input type="email" name="email" placeholder="Your Email" required>
            <textarea name="message" placeholder="Your Message" required></textarea>
            <button type="submit">Send</button>
        </form>
    </section>
<?php include 'includes/footer.php'; ?>
Step 10: Handle Form Submission with PHP
Create send_message.php to process form data.
<?php
if ($_SERVER["REQUEST_METHOD"] == "POST") {
    $name = htmlspecialchars($_POST['name']);
    $email = htmlspecialchars($_POST['email']);
    $message = htmlspecialchars($_POST['message']);

    // Simple validation
    if (!empty($name) && !empty($email) && !empty($message)) {
        // Send an email (this requires a mail server setup)
        // mail($to, $subject, $message, $headers);

        echo "Thank you, $name. Your message has been sent!";
    } else {
        echo "Please fill in all fields.";
    }
}
?>
Step 11: Deploy Your Portfolio
- Test Locally: Run on XAMPP, MAMP, or a local PHP server (
php -S localhost:8000). - Host Online: Use hosting providers like Netlify (for static content) or a PHP host like Namecheap, Bluehost, or Hostinger.
- Get a Domain: Buy a domain and link it to your hosting.
Final Thoughts
With this structured approach, you now have a clean and professional PHP-based portfolio. You can further enhance it by:
- Adding animations (CSS or JavaScript)
- Using a MySQL database for dynamic content
- Implementing dark mode
- Optimizing for SEO and performance
Categories
- Make Money
- Product Review
- Social Media
- Excel
- Graphics design
- Freelancing/Consulting
- E-commerce and Digital Marketing
- Business
- Self Development
- Tips to Success
- Video Editing
- Photo Editing
- Website Promotion
- YouTube
- Computer
- Phone
- Music
- Spirituality & Faith
- School
- Tech & Digital
- Gaming
- News
- Digital Economy / Technology
- Relationship
- Creative Arts & Design
- Medical
- Causes
- Networking
Read More
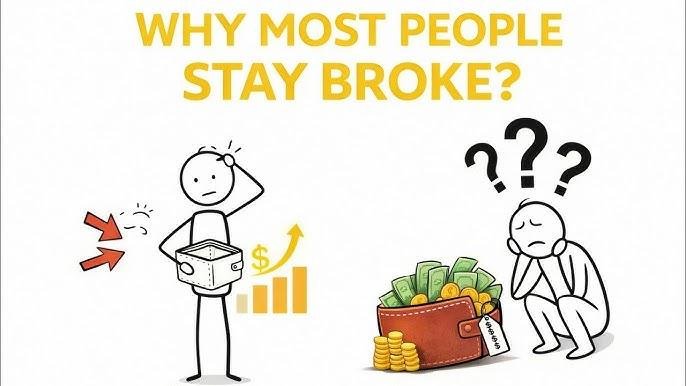
When money is tight, the usual advice shows up fast: “Stop spending so much.”Cut coffee. Avoid outings. Live minimally. But here’s the uncomfortable truth—most young people aren’t broke because they spend too much.They’re broke because of something deeper and more structural. Spending Is Visible. The Real Problem Is Not. Spending is easy to blame because...
Introduction In life, two of the most crucial aspects that define an individual’s stability and quality of life are financial and career growth. While financial growth ensures security, comfort, and the ability to achieve personal aspirations, career growth determines one's professional fulfillment, social standing, and self-worth. These two concepts are deeply intertwined, as...

Introduction: The Silent Architecture of Success Success begins long before the results appear. It does not start when the applause comes, when the bank account grows, or when people begin to celebrate your accomplishments. Success begins in the mind. It grows in the quiet, unseen spaces where thoughts form, decisions take shape, and beliefs solidify. A success-attracting mindset is not a gift...

Remote work isn’t just a trend anymore.Office work isn’t dead either. In tech, both models are thriving — from fully distributed companies like GitLab to hybrid setups at Google and structured in-office cultures at Apple. The real question isn’t: Which one is better? It’s: Which trade-offs are you willing to accept? Let’s break it down honestly....
Executive Summary: (Your Business Name) is a digital-first perfume brand based in Nigeria, focused on selling high-quality designer-inspired perfumes and oil-based fragrances. With a startup capital of ₦500,000, the business will operate 100% online, targeting both Nigerian and international customers through social media, e-commerce platforms, and global logistics partners. Business...

